
1. Clear the cache
Some Android applications utilize stored data, called Cache so that they can offer a smooth experience. The cache saves time, but the files stored in the cache are not necessary. If you want to wipe space from your mobile, the first thing you should do is to clear the cache.
To free cached data from a specific application, navigate to Settings > Applications > Applications Manager and click on the app you want to alter. In the app’s info menu, select storage and then tap Clear Cache to clean the app’s saved data.
To wipe cached data fro, all the apps on your device, go to Settings > Storage and select Cached data to clean the caches stored on your phone.
2. Delete your downloads
An Android phone contains a download folder that stores everything you download, ranging from photos to documents. You are probably not too attached to a lot of the files you have downloaded over the day, weeks, months, and years. If this is the case, then there is much space here just waiting to be cleared.
You will find your downloads record, called My Files, in your app drawer. Hold a file for a second to select it and delete it by touching on the trash icon.You will find your downloads record, called My Files, in your app drawer. Hold a file for a second to select it and delete it by touching on the trash icon.
3. Utilize Google Photos
You know what? Google Photos allows you to back up an infinite number of photos. You can back up every single picture you take on your Android phone and store it on your Google Drive. When you have backed up your photos, delete them from your Android device to free up space.
Turn Google Photos’ Back up & Sync feature on to benefit from this free cloud storage space. Open the Google Photos App, navigate to Settings > Back up & sync to turn it on.
You can choose to back up your photos at a higher resolution, of up to 16 MP, or at their original size. Google Photos offers the unlimited capacity to store high-quality pictures and images backed up at the original size will stand apart from your Google Drive storage limit.
When you have backed up your images through Google Photos, navigate to Settings > Free up device storage, and Google Photos will automatically delete the multimedia that has been backed up.
4. Transfer apps to the microSD card
Applications take up the most storage on your mobile phone. In most Android phones, you can insert a microSD card to add extra memory. You can then use this extra memory to store some of your disk-space-hogging apps.
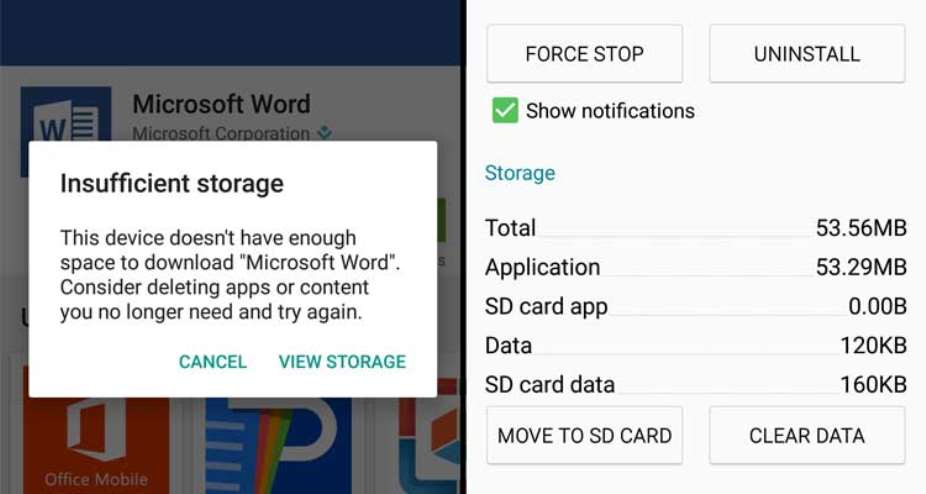
To enable this, open Settings > Applications > Application manager and select the application you want to transfer.
If you can transfer the app, you will see a prompt button stating Move to SD card – this button will transfer the app to the microSD card. Not all of the app will be moved to the microSD card. How much depends on the app itself.
5. Add apps to the trash
Have you been through all these tips and tricks and you still lack space? Start deleting. There are apps on your Android mobile phone which you never use.
 Whoever participated in the plunder of the state must be held accountable – Jane...
 A vote for John and Jane is a vote to pull Ghana from the precipice of destructi...
 I’ll repay your abiding confidence with loyalty, understanding and a devotion to...
 ‘I’ve learnt deeply useful lessons for the future' — Serwaa Amihere breaks silen...
 I’m sorry for the embarrassment – Serwaa Amihere apologises for leaked sex video
 Dumsor: Matthew Opoku Prempeh not in charge of Energy sector – Minority
 Adu Boahen’s murder: Police arrest house help who was in possession of deceased’...
 Akufo-Addo nominates Felicia Attipoe as Tema West MCE
 Election 2024: I can't have someone I defeated twice as my successor – Akufo-Add...
